In short
- Configure your self-hosted ntfy server over HTTPS with auth-default-access: "deny-all" and mint a dedicated tk_... Bearer token (or Basic auth user) for your Mac.
- Enable upstream-base-url: "https://ntfy.sh" in server.yml so iOS wakes up via APNs and fetches messages from your private server in the background.
- In NotiFerry (Settings → Connection), enter your HTTPS server URL and paste your Access token or Username & password (stored in macOS Keychain, never in plain-text preferences).
- NotiFerry reads new Notification Center entries read-only from the usernoted db2 folder without Full Disk Access and publishes filtered alerts to your server.
Why run a self-hosted ntfy server for macOS notifications?
The public ntfy.sh service is the fastest way to test Mac-to-iPhone forwarding, because it requires no account or server setup. However, many Mac developers switch to a self-hosted ntfy instance (running in Docker, on a home server, or on a small VPS) for three practical reasons:
| Aspect | Public ntfy.sh | Self-hosted ntfy server |
|---|---|---|
| Access control | Unguessable topic name on the free tier (or paid ntfy.sh account) | auth-default-access: "deny-all" with tk_... Bearer tokens or Basic auth |
| Daily publish quota | 250 messages / 24h per visitor IP | Controlled by your own server configuration |
| Message retention & infrastructure | Third-party server; cached in plaintext for ~12 hours by default | Your own server and disk cache retention policy |
1. Create a scoped ntfy Bearer token or Basic auth user
On your self-hosted ntfy server, enable access control in /etc/ntfy/server.yml and create a dedicated user and tk_... access token for your Mac so you can revoke it independently of your phone:
# On your self-hosted ntfy server (Docker or ntfy serve)
# 1. Restrict default access in /etc/ntfy/server.yml:
#    base-url: "https://ntfy.example.com"
#    auth-file: "/var/lib/ntfy/user.db"
#    auth-default-access: "deny-all"

# 2. Create a user and grant write/read access to your Mac topic:
ntfy user add mac-forwarder
ntfy access mac-forwarder mac-alerts rw

# 3. Mint a dedicated Bearer access token (tk_...) for your Mac:
ntfy token add --label="MacBook Pro NotiFerry" mac-forwarder
For reliable background wakeups on iOS when the iPhone screen is locked, also set upstream-base-url: "https://ntfy.sh" in your server.yml, as documented in the ntfy iOS instant notifications guide. That setting sends a lightweight poll-request hash through Apple Push Notification service (APNs) so the iPhone ntfy app wakes up and fetches the actual message payload directly from your private server.
You can verify your server URL and token from macOS Terminal before configuring any app:
# Test publishing from macOS Terminal with your Bearer token
curl -H "Authorization: Bearer tk_your_secret_token" \
  -H "Title: Xcode" \
  -d "Archive succeeded" \
  https://ntfy.example.com/mac-alerts
2. Connect NotiFerry to your self-hosted HTTPS server
NotiFerry supports custom self-hosted ntfy servers out of the box in Settings → Connection:
- Server URL: Enter your full HTTPS base URL (for example,
https://ntfy.example.comor your Tailscalehttps://machine.tailnet.ts.netURL). NotiFerry enforces HTTPS and rejects credentials embedded inside the URL string. - Authentication: Select Access token (sends
Authorization: Bearer tk_...) or Username & password (sends HTTP BasicAuthorization). NotiFerry stores the secret in macOS Keychain—never in plain-text preference files or diagnostic exports. - Secret topic: Keep the generated random topic or enter the topic name you authorized with
ntfy access, then click Save connection. - Confirm the phone test: Click Send test and confirm I saw it on my iPhone once the alert arrives in the iOS
ntfyapp.
Once connected, NotiFerry reads new entries from the macOS Notification Center SQLite database using a single read-only folder bookmark (no Full Disk Access), applies your chosen privacy mode (Full notification, Title only, or Generic alert) and per-app block list locally on the Mac, and publishes matching alerts to your self-hosted server.
See how NotiFerry runs on your Mac
Grant read-only access to the Notification Center folder (no Full Disk Access), subscribe to your private ntfy topic in the free iPhone app, and confirm that a real test arrived to start your 7-day trial.
brew install --cask n2ctech/tap/notiferry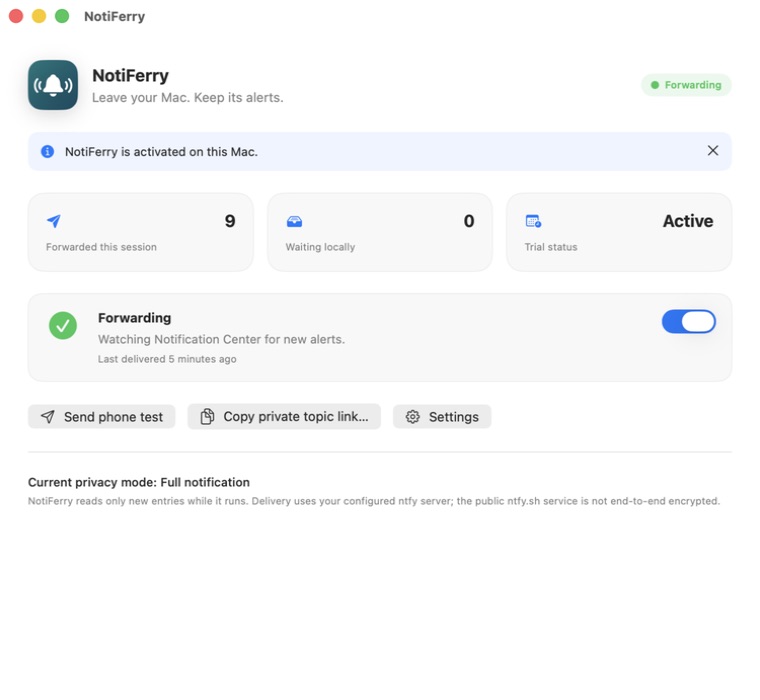
Questions
Does NotiFerry require HTTPS for self-hosted ntfy servers?
Yes. Because forwarded notifications and Bearer or Basic credentials travel over the network, NotiFerry requires an https:// server URL with a valid TLS certificate (such as Let's Encrypt via Caddy/NGINX, Cloudflare Tunnel, or Tailscale HTTPS).
Where does NotiFerry store my ntfy Bearer token or password?
NotiFerry stores your secret topic, Bearer access token, or Basic auth password in the macOS Keychain. Credentials are never written to UserDefaults or included when you copy a privacy-safe diagnostic report.
Does the 250-message daily warning apply to a self-hosted ntfy server?
No. NotiFerry's local 24-hour publish counter only warns when your endpoint is the public ntfy.sh service. When you configure a custom self-hosted HTTPS server, rate limits are governed entirely by your own server configuration.